Knowledge Base

Remote Support Setup

Contents

1. macOS Remote Support Setup 
2. Windows Remote Support Setup 


IMPORTANT: Please download the remote support file provided to you by email and follow the appropriate steps for your operating system below. You will then need to reply to us with your ID Number and Password (if one shows). 


macOS Remote Support Setup
 

1. To initiate a remote support session on your macOS computer, ensure that all software updates are installed. This will help ensure that the remote support software runs smoothly and that any known issues with your operating system are resolved. To do this:
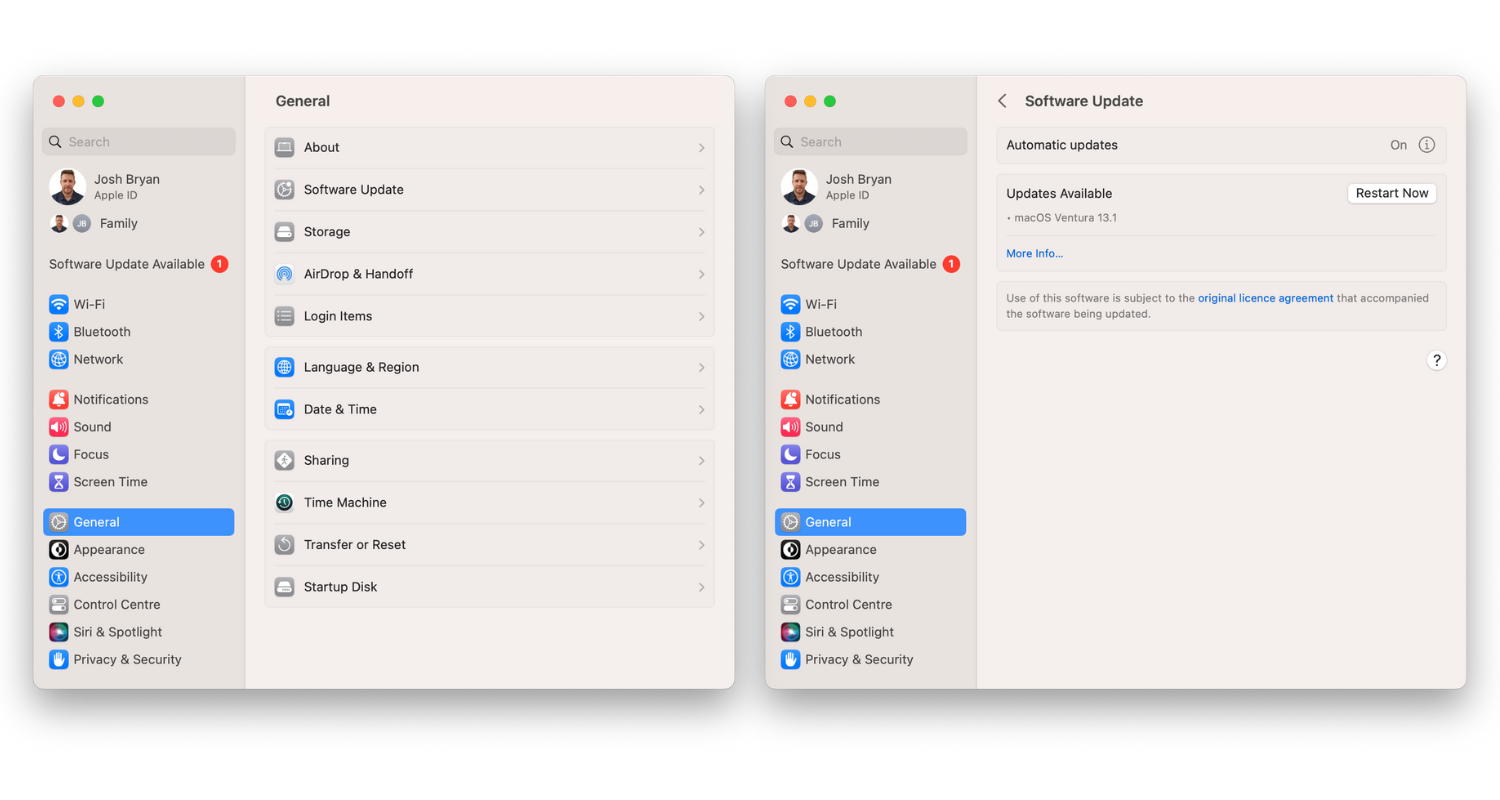
  • Open System Settings
  • Click General
  • Click Software Update
  • Apply any updates or restarts required.


2. After updating macOS computer, follow these steps to access the TeamViewer remote support app:
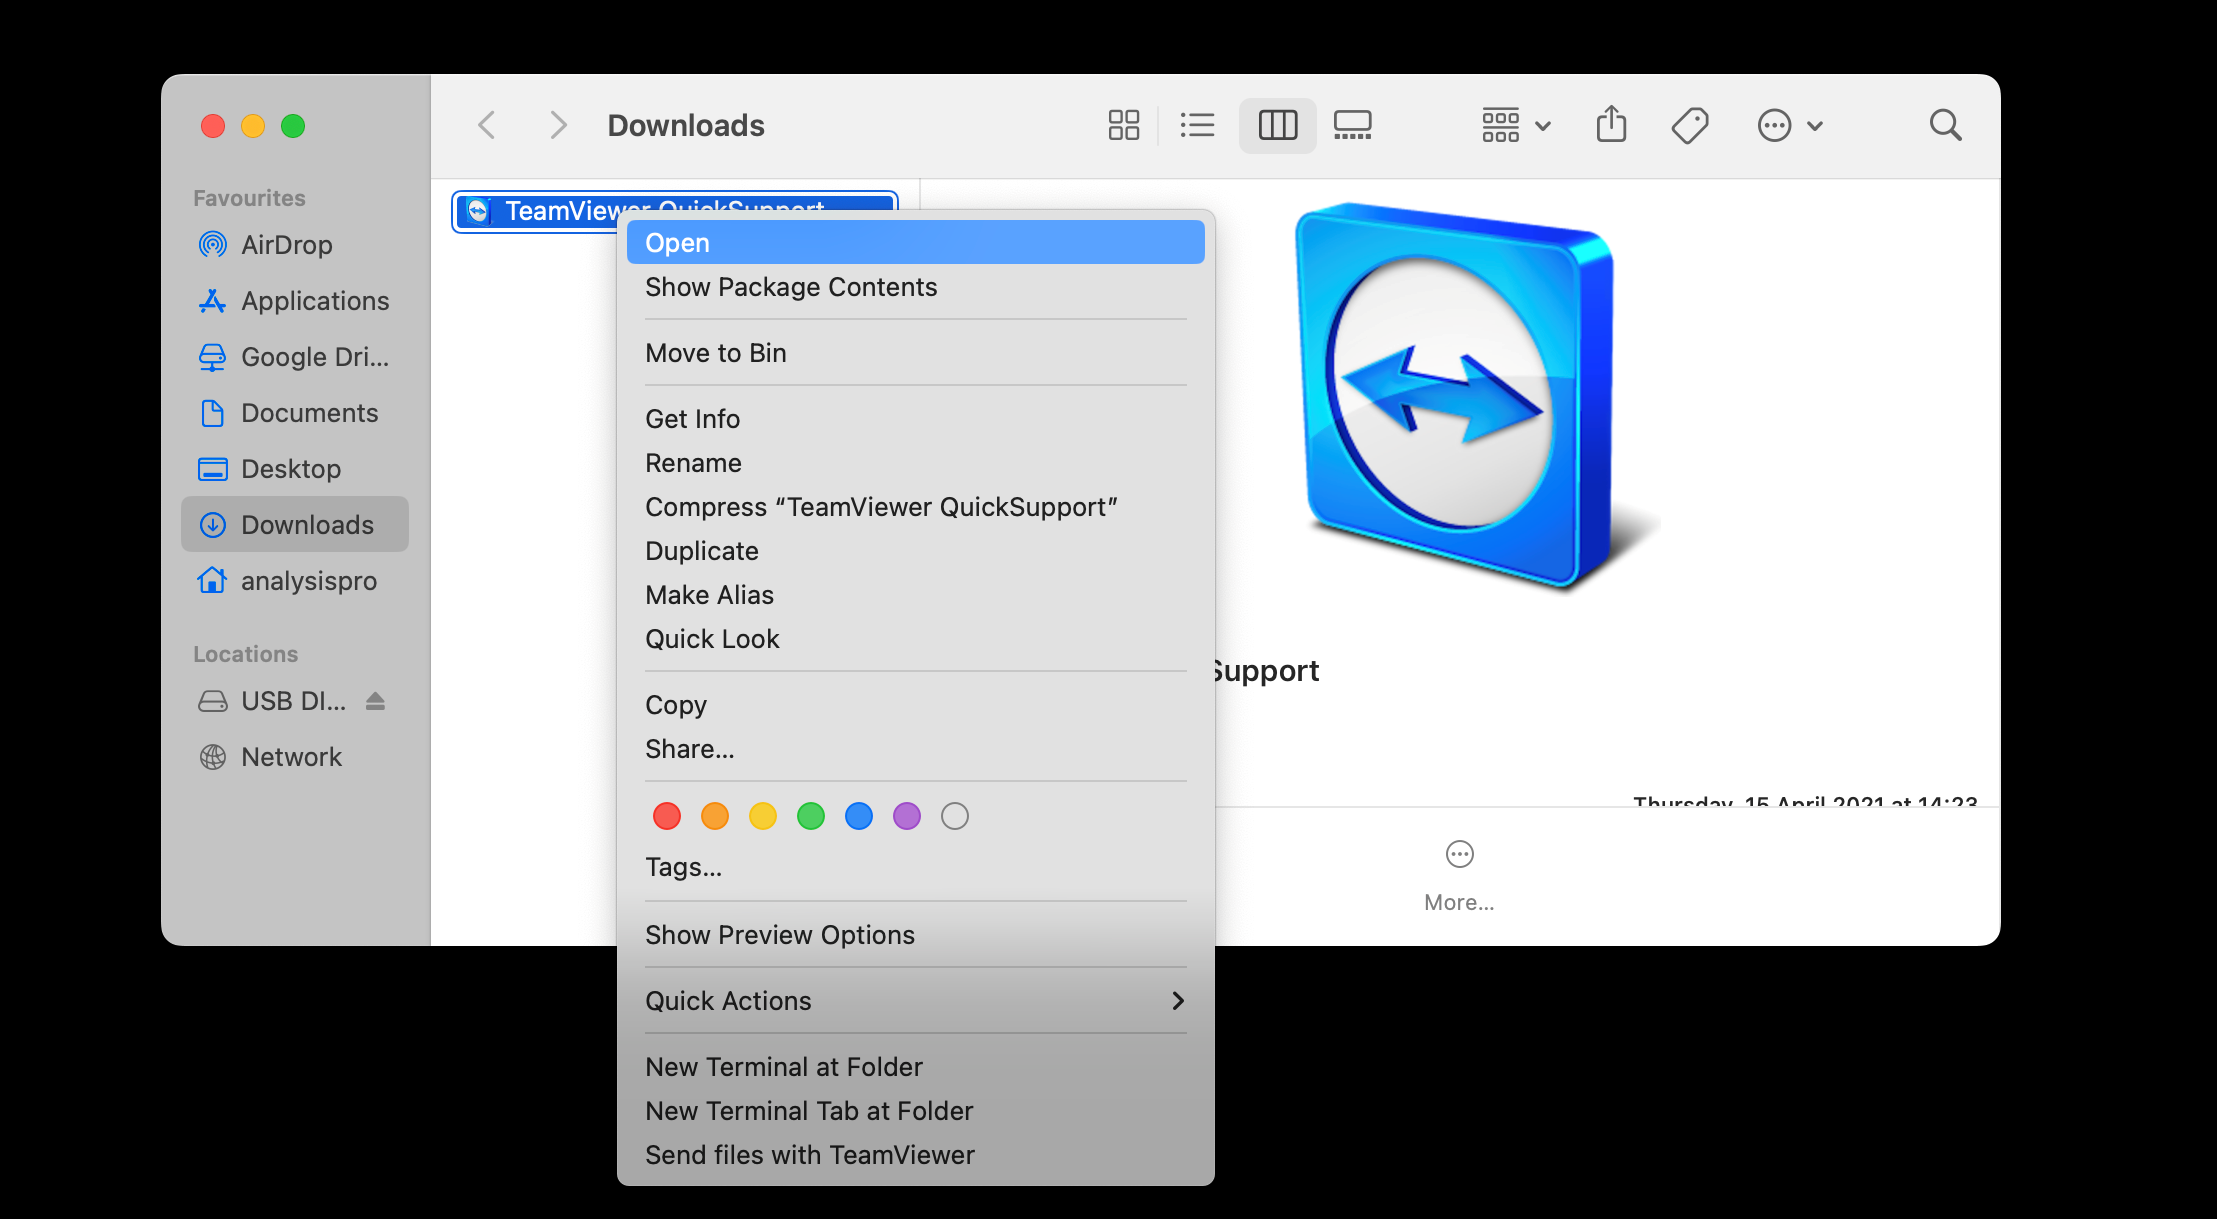
  • Download the remote support file from the link in your email, then open the downloaded file to unzip it.
  • Locate the TeamViewer QuickSupport file, which should appear in your Downloads folder.
  • Control-Click the TeamViewer QuickSupport file, then choose ‘Open’ from the shortcut menu. This will open the TeamViewer app and allow you to initiate a remote support session.


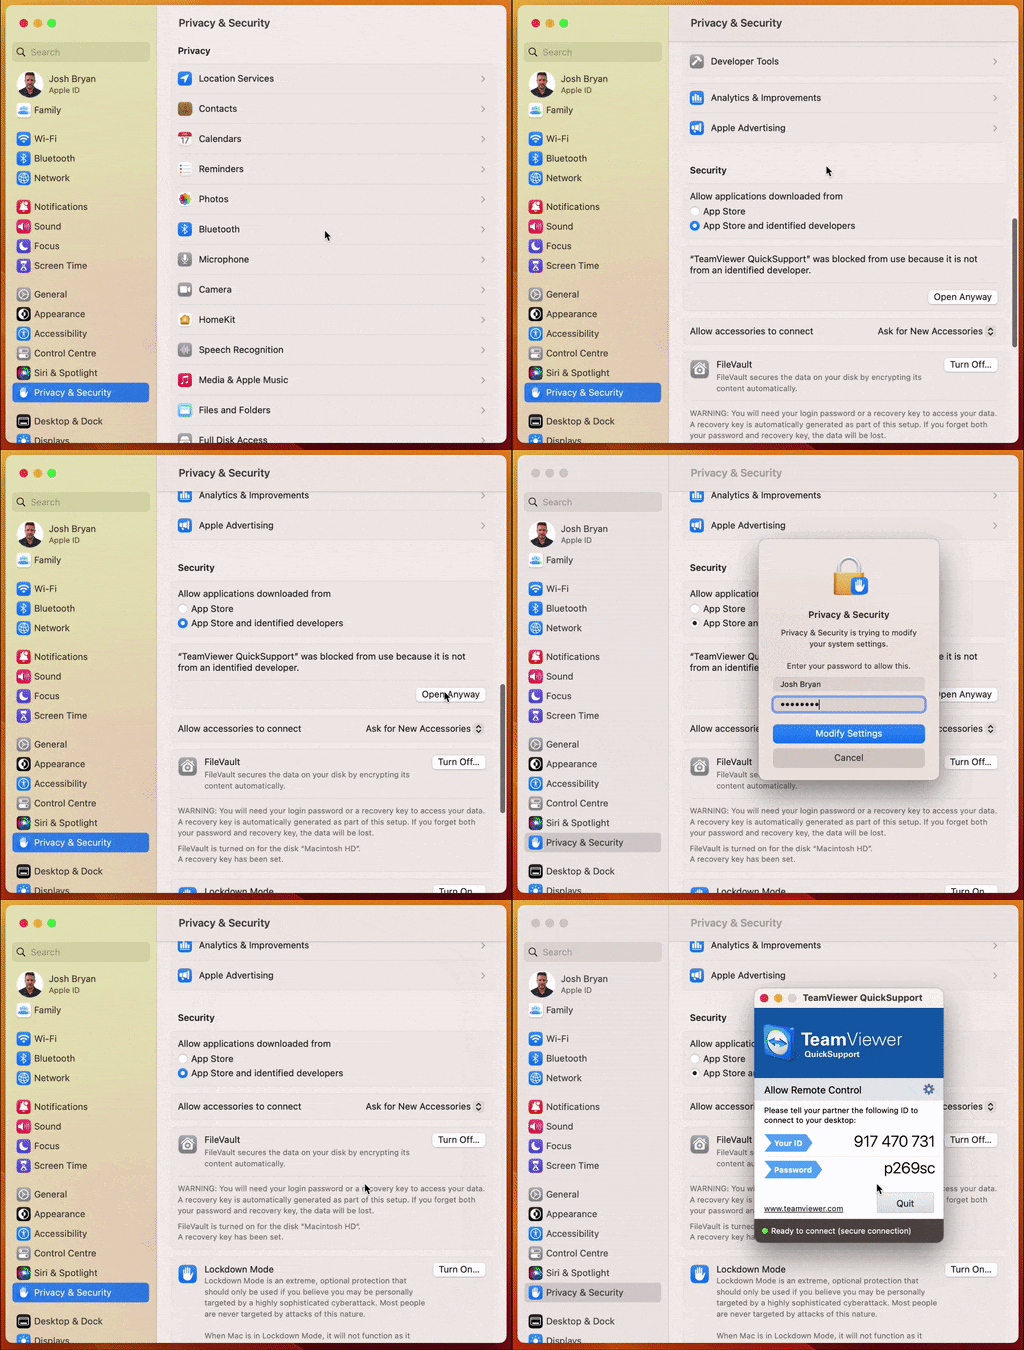
3. After downloading and unzipping the TeamViewer file from the website, if you get a warning window telling you that the file can't be opened, you can follow these steps to launch the app


If you see the windows labelled 'A' above, follow these steps.

  • Choose "Open" in the warning window.
  • TeamViewer will then launch.
  • This action will grant an exception for TeamViewer, so you will be able to double-click the app icon to launch it in the future without any warning or issue.


If you see the windows labelled 'B' above, follow these steps. 

  • Choose "OK" in the warning window.
  • Open 'System Settings' 
  • Click on 'Privacy & Security' on the left-hand side.
  • Scroll down to security and click 'open anyway' where TeamViewer is located. 
  • This action will grant an exception for TeamViewer, so you can double-click the app icon to launch it in the future without any warning or issue.

Please see this video for reference:


4. Before running TeamViewer, you must give the app all necessary permissions for Accessibility and Screen Recording in the Privacy & Security settings. To do this, follow these steps:
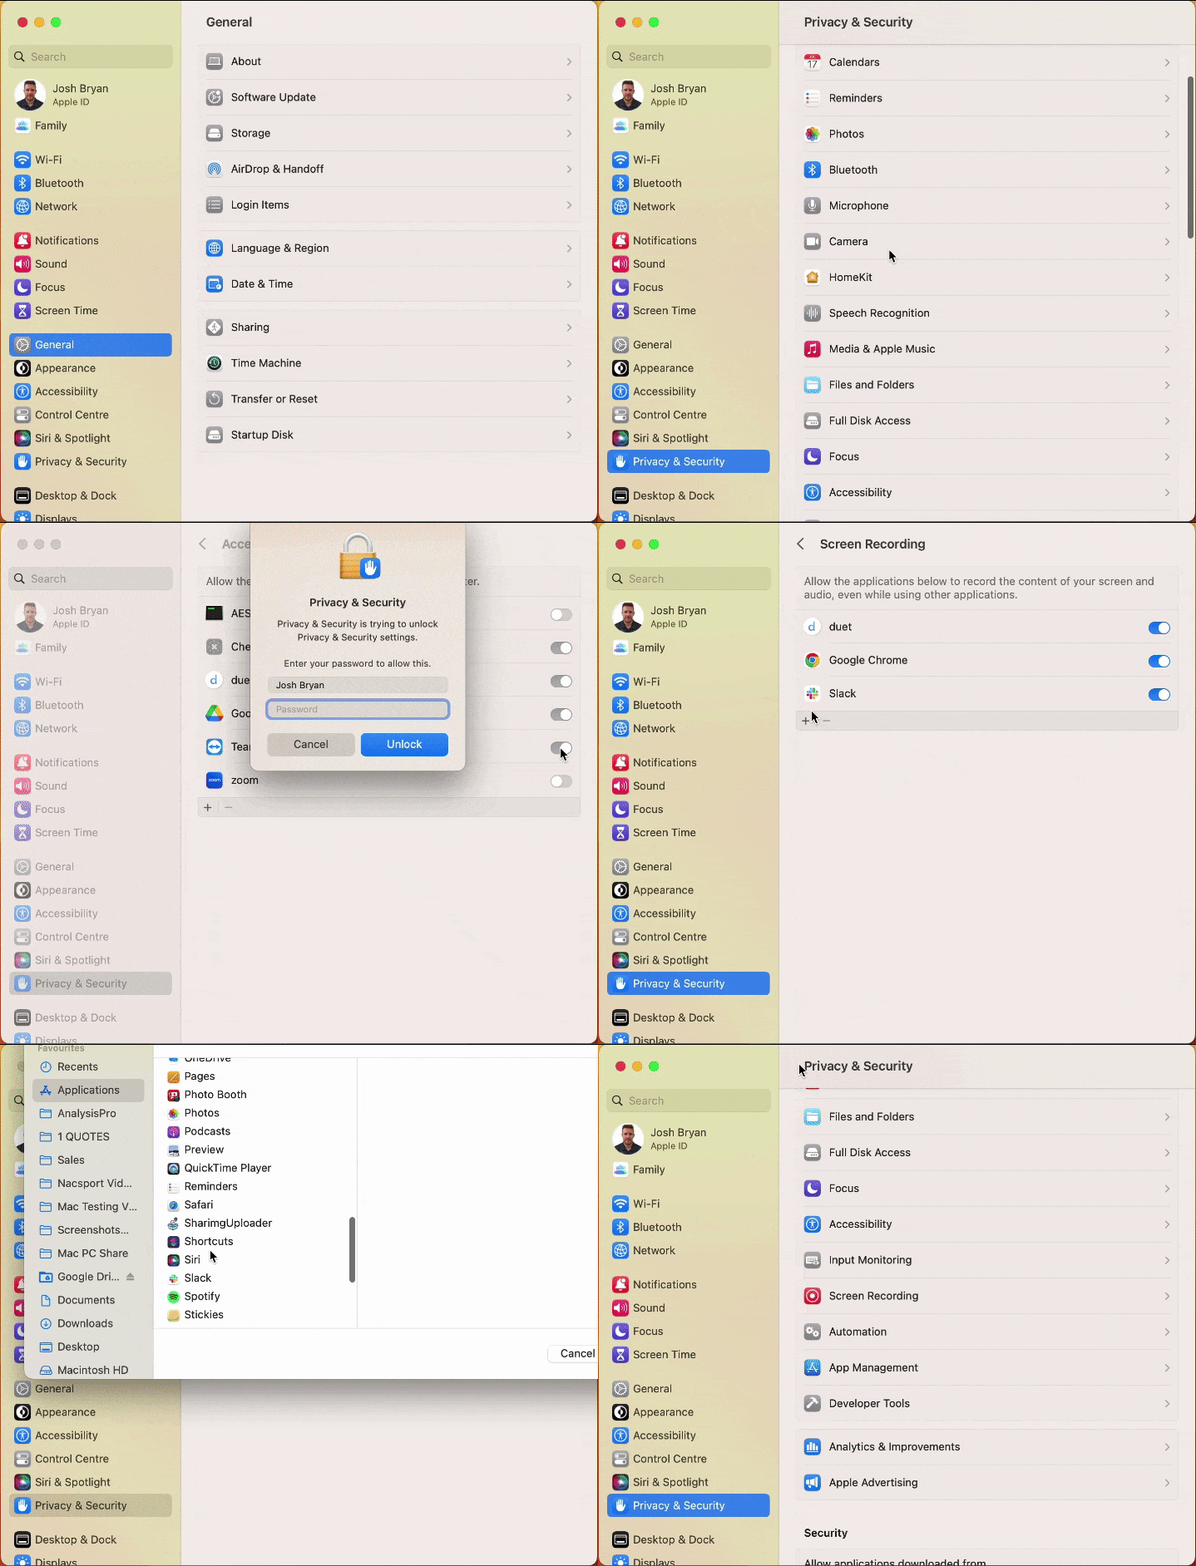
  1. Go to System Settings.
  2. Click on Privacy & Security.
  3. Scroll down and click on Accessibility.
  4. Toggle the TeamViewer application ON and enter your password.
  5. Go back and scroll down to Screen Recording and turn toggle the TeamViewer application ON.
  6. If you don't see the TeamViewer application in the list, click the + icon, find the application in your Applications/Download folder and double click it to add it.


If TeamViewer is visible under 'Camera' in the Privacy settings, then make sure to tick the box next to it to enable it there as well. This will allow TeamViewer to access the camera on your computer, if necessary for the remote support session.


5. With the TeamViewer app set up and permissions granted (you shouldn't have to repeat these steps in future), it is now ready for a remote support session.
To initiate a session, follow these steps:

  • Launch the TeamViewer app.
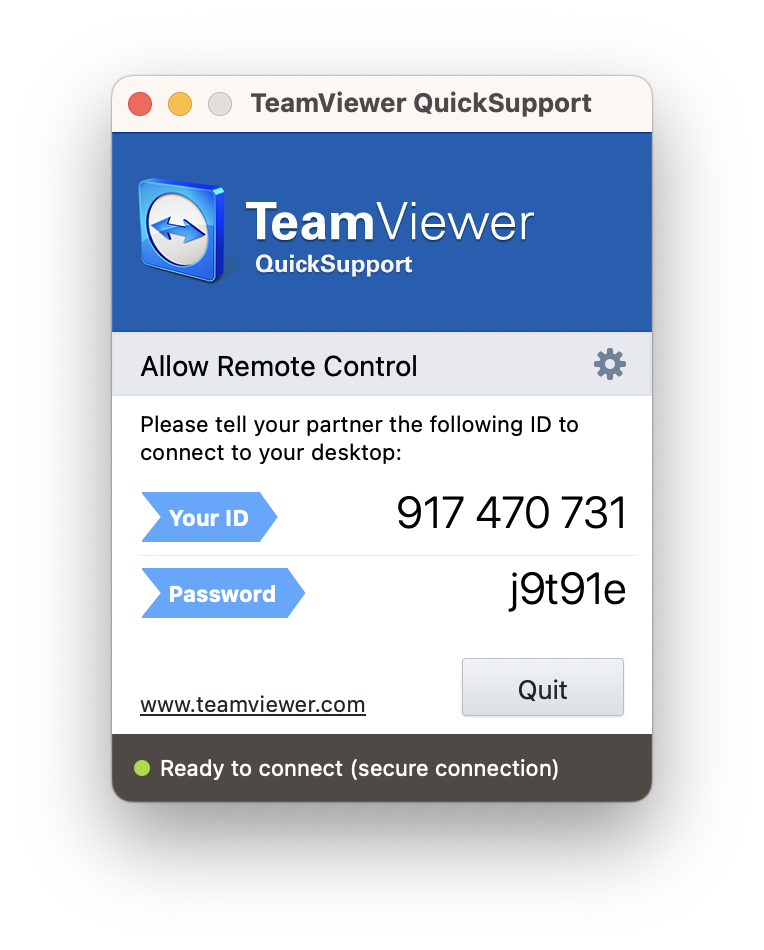
  • You will see an ID number and password on the screen.
  • Send an email to the support team with the ID number and password.

IMPORTANT: Please keep the window with the ID number open during the entire remote support session, as the support team will not be able to access your Mac if it is closed. Also, it is important to ensure that your computer is connected to a stable internet connection.


Windows Remote Support Setup


1. To ensure a successful installation of TeamViewer, we recommend using an Administrator account on your Windows computer.


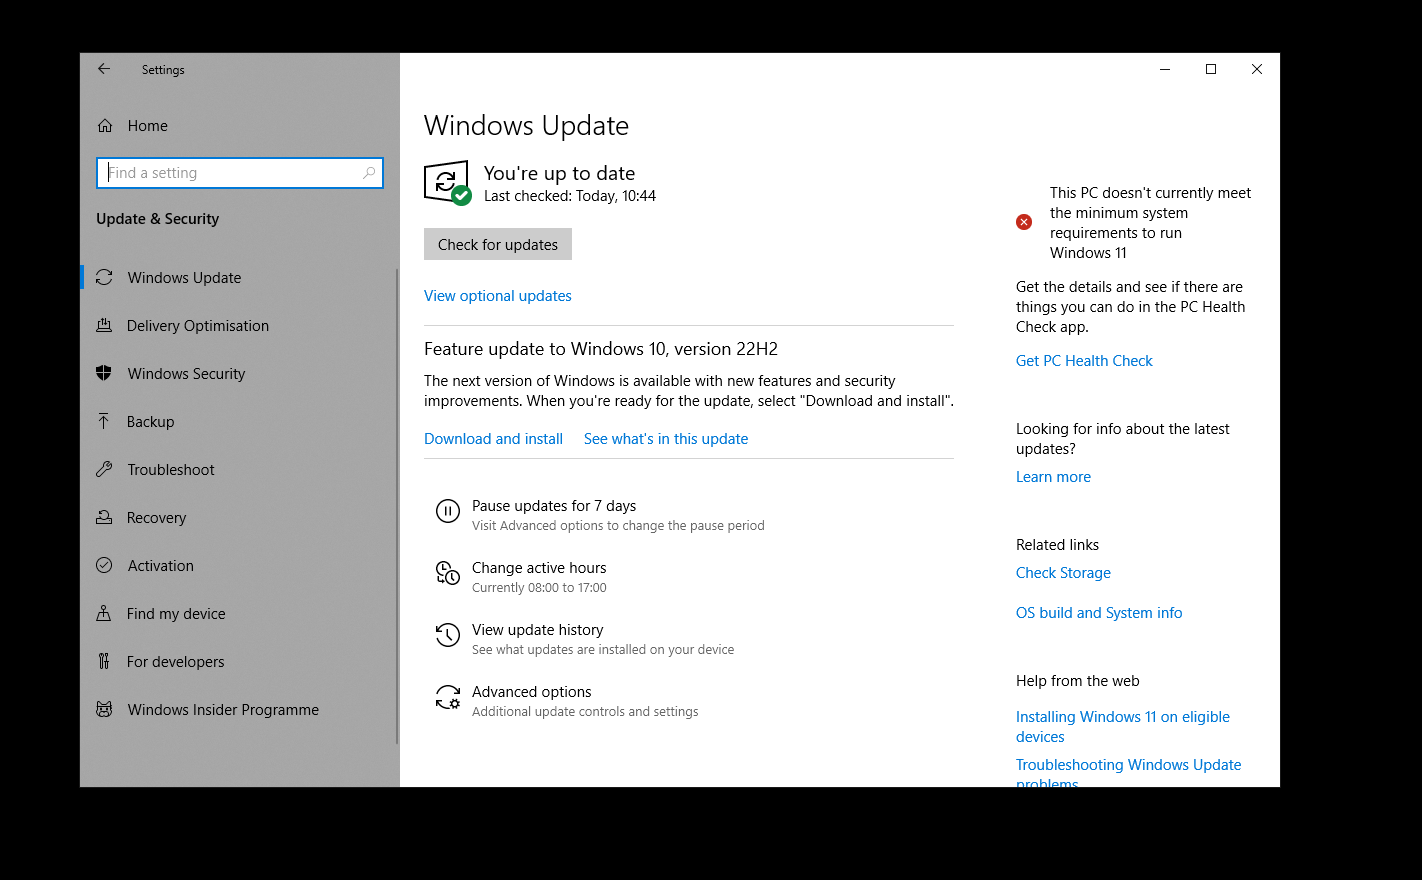
2. Before proceeding, make sure all Windows updates are installed and check for updates again once the installation is complete, in case any newly installed updates require additional updates.


3. To download and run the TeamViewer remote support link, please follow these steps:

  • Download the remote support file from the link in your email, which will download the TeamViewer support file.
  • Once the download is complete, open the file and run the installation.
  • Follow the instructions to complete the installation.


4. After the installation is complete, launch TeamViewer and send us an email with the ID number and password that appears on the screen.
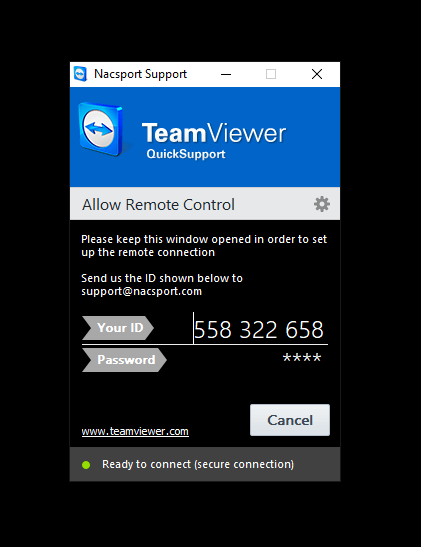
  • IMPORTANT: Keep the window with the ID number open during the entire remote support session so that the support team can access your computer. It is also important to ensure that your computer is connected to a stable internet connection.


Troubleshooting


1. If you are unable to run the setup or update files for Nacsport, it may be because your antivirus software has placed the installation files in quarantine. To resolve this issue:

  • Open your antivirus software.
  • Restore the files from quarantine (you may need to search online for specific instructions for your antivirus software).
  • Exclude the setup or update files from future scans (you may need to search online for specific instructions for your antivirus software). This should allow you to run the setup or update files without any issues.


BACK TO TOP